Using virtual environments as a web developer is extremely efficient in the long run but the most powerful part of it is being able to restore and export the machines for later jobs. The time it takes to set up proper virtual development environments can take awhile but the benefits far outweigh the time spent. When i switched from developing on just IDE's and their local tools to full blown development virtual environments is when I really started to feel like a pro developer.
Today I will walk through a basic web development virtual environment with Virtualbox and Ubuntu Server 18.04 for Wordpress sites. This is useful for any developer who deals with Wordpress but its especially useful when you do more than just develop the website for example setting up the server, penetration testing the server or Wordpress plugin setups. Wordpress plugins are notorious for their vulnerabilities and utilizing a complete virtual network or server environment helps the keeping your clients Wordpress site secure as it can be. So lets begin.
First download the latest VirtualBox:

Run the install file:

Leave the default install settings and just let it install:

Next download Ubuntu Server 18.04:

Start up Virtualbox and create a new virtual machine:

Pick a name and folder for the machine and choose type "Linux" and Version "Ubuntu 64b":

Select at least 1GB of memory:

Select "Create a virtual hard disk now":

Choose VDI:

Choose "Fixed Size":

Make the Virtual Hard Disk at least 10GB:

Let Virtualbox create the drive, this can take a few minutes:

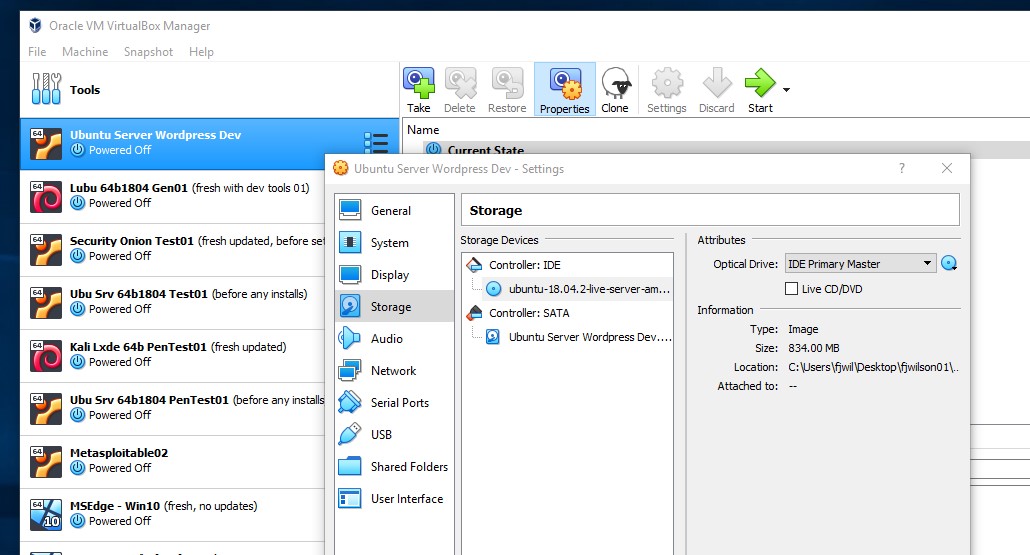
After Virtualbox is finished click Settings for the machine you just created. Select "Storage", then click the "Empty" disk icon. Next click the disk icon next to "IDE Secondary Master" and select "Choose Optical Disk File". This will allow you to go to the folder you downloaded Ubuntu Server to so select that:

Now you should see your Ubuntu Image file under Controller IDE:
Leave the "System" settings at default:

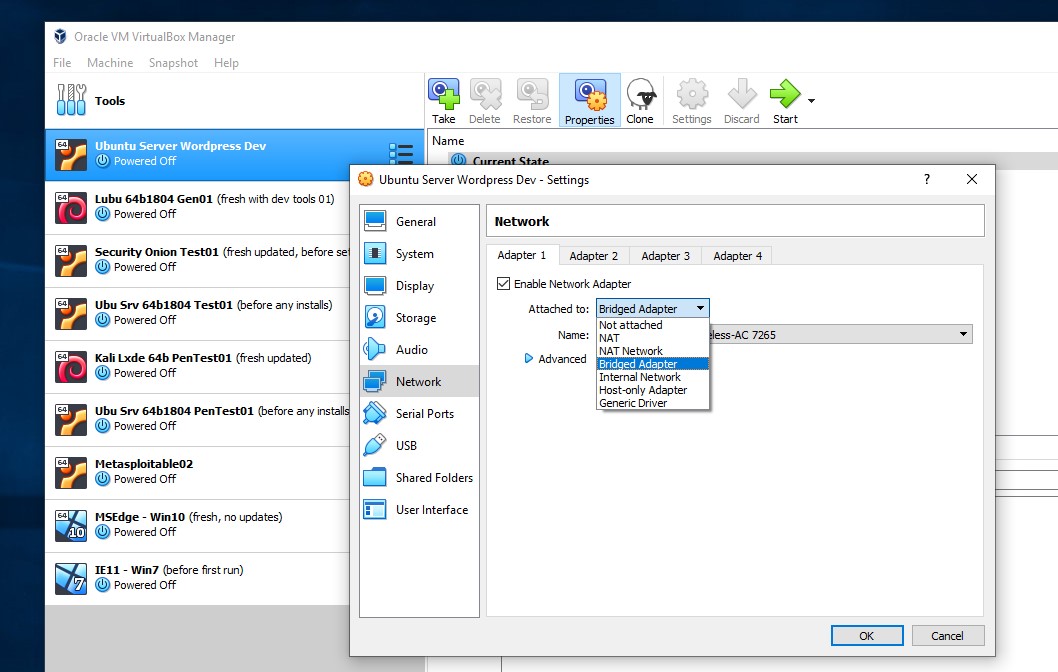
Next click the "Network" setting and select "Bridged Adapter". This will easily allow you to access your development website on your host PC and other virtual machines you create:
Exit settings then start the virtual machine by clicking the "Start" green arrow on the upper right:

You will get some terminal messaging then you will end up at the Ubuntu install settings dialogs which are pretty self explaining. The first is to choose your preferred language:

Next your keyboard layout, make your selections then cycle down with the tab key:

Select "Install Ubuntu" here then press enter:

For the network connection just let the default network adapter and DHCP stay then tab down and select "Done":

Leave proxy blank, tab down and select "Done":
Leave the default mirror for Ubuntu, tab down to "Done" and press enter:

Select "Use the Entire Disk":

Select the VBox disk you created earlier in machine creation settings and press enter:

Leave the next settings and select "Done":

It will verify if you want to continue, so tab to "Continue" then press enter:

Create your user login credentials, you can make anything up you want just remember them:

Select "Install OpenSSH server", choose "No" to not import SSH Identity:

Were not going to select any other software to install right now so just tab down to "Done" and press enter:

Now let it finish installing, it can take a few minutes:

After it is done you will see the option below so just select "Reboot" now then press enter:

It will ask you to press enter one more time to reboot:

After it reboots you will find yourself at login. Sometimes 18.04 will print a few more log outputs so just press enter and let them finish, then login with your username credentials:

Enter your password then press enter:

The first thing we will do is update and upgrade so at the command prompt type in:
sudo apt update && apt upgrade
then press enter:

Sometimes with Ubuntu 18.04 just after install you will get the following error message but its not a problem. For now just reboot so we can create a VirtualBox snapshot. At the command prompt type:
sudo poweroff
then press enter:

At the main Virtualbox window select your virutal machine and click the "Take" icon on the top menu. Name the snapshot something useful:

Now reboot the Ubuntu machine, login, then try to update && upgrade again, at the command prompt type:
sudo apt update && upgrade
then press enter:

The command prompt will ask you to type "Y" to continue with update so just do that:

In a minute you will get a dialog asking you to accept auto restart of updating services so tab over to "Yes" then press enter:

After updating and upgrading completes reboot the machine and login:


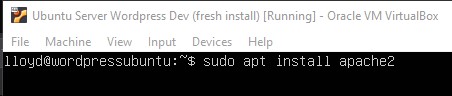
Now we are going to install Apache web server so at the command line type:
sudo apt install apache2
then press enter:
After Apache competes its install we want to get the virtual machine servers ip address so we can view the server from a browser on your host machine. At the command line type:
ifconfig
note the top inet address, it will look something like 192.168.x.x:

Go back to your host/physical PC, open a browser and type in the last steps ip address in the url bar. You should see the default apache web page:

Wordpress requires a database so lets install the open source version of mysql. At the CLI(command line) type:
sudo apt install mariadb-server mariadb-client
press enter and let that install:

When that finishes we should run the following command:
sudo mysql_secure_installation
press enter and enter the following answers to the commands questions:
- Set mysql root password = Y
- enter new password
- re-enter new password
- Remove anonymous users = Y
- Disallow root login remotely = Y
- Remove test database and access to it = Y
- Reload privilege tables now = Y

Now install php and its wordpress/mysql dependencies. If you get an error message typing all this in at the command line its most likely because theres a spelling error. At the command line type and press enter:
sudo apt install php7.2 libapache2-mod-php7.2 php7.2-common php7.2-mysql php7.2-gmp php7.2-curl php7.2-intl php7.2-mbstring php7.2-xmlrpc php7.2-gd php7.2-xml php7.2-cli php7.2-zip
After all that finishes installing we need to edit the php config php.ino file for wordpress's requirements. We will be using vim, here is a useful quick guide if your not familiar with vim, VIM editor. So at the command line type:
sudo vi /etc/php/7.2/apache2/php.ini
edit or add the following lines(which can be in different locations in the file), sometimes you may just have to uncomment a line by removing the # at the start of the exact line:
file_uploads = On
allow_url_fopen = On
short_open_tag = On
memory_limit = 256M
upload_max_filesize = 100M
max_execution_time = 360
date.timezone = "pick your timezone"

After that save the file in vim by pressing "Esc" to exit any editing mode you may be in. Then type ":w" and press enter to save the file with VIM.
Next restart apache services:
sudo systemctl restart apache2service

Now we want to test if php installed correctly so at the command line type:
cd /var/www/html

Now your in your web server root documents folder. We need to create a php file and run a test php function:
sudo vi php-test.php

Once you have that file open in VIM, type the text in that file exactly as shown below then exit VIM:

Now we go back to our host pc browser and type in your servers IP address and the file name of the file you just created. Something like this:
192.168.x.x/php-test.php

After that since we have a lot of work done we want to shutdown the machine and create a new snapshot:

Next we need to create a database for wordpress so log back into the Ubuntu Server virtual machine and at the command line type:
sudo mysql -u root -p
At the mysql command prompt we need to enter the following commands as shown below and in the image(these commands are case sensitive):
CREATE DATABASE wpdatabase;CREATE USER 'yourusername'@'localhost' IDENTIFIED BY 'yourpassword';GRANT ALL ON wpdatabase.* TO 'yourusername'@'localhost' IDENTIFIED BY 'yourpassword' WITH GRANT OPTION;FLUSH PRIVILEGES; EXIT;

Now change directory to your home directory and download the latest wordpress:
cd ~
wget https://wordpress.org/latest.tar.gz

In the same directory you downloaded wordpress to extract the wordpress compressed file:
tar -xvzf latest.tar.gz

Move a copy of that wordpress folder to your web server root documents folder and set the correct permissions on that folder. At the command line type the following commands:
sudo mv wordpress /var/www/html/wordpress
sudo chmod -R 755 /var/www/html/wordpress/
sudo chown -R www-data:www-data /var/www/html/wordpress/

This is another good spot to shut down and create another snapshot:

Now we can go to our browser on our host machine and navigate to our wordpress folder. Type something like 192.168.x.x/wordpress/ into your browser url box but use your correct virtual machines ip address:

Now the wordpress setup is pretty self explained, it includes easy directions as you go through the steps:


Remember all your user info and database credentials you created earlier in this guide. Type them in now:


Here is your blogging wordpress panel. Note your browsers new wordpress admin URL or bookmark it:


So now you have a "more proper" wordpress website development virtual machine platform. From here on out you can experiment with wordpress development, addons, themes. You can add a blog sub domain to your regular website. You can play with server settings, penetration test your wordpress setup or after you setup another pentesting operating system you can test and upgrade the security of your development server for your production system.
Thank you for reading, I hope you find some of this useful! More on Security and Servers to come!
Comments
Post a Comment